Wire railing systems have transformed deck design over the past decade, offering homeowners a sleek alternative to traditional wood or metal balusters. Unlike solid panels that block sightlines, wire railings use thin, weather-resistant cables strung between posts to create a modern, minimalist look while maintaining safety and structural integrity. Whether you’re building a new deck or upgrading an existing one, understanding how wire systems work, and whether they’re right for your project, is essential. This guide walks through what wire railings are, why they’ve become so popular, and what’s involved in installing them properly.
Table of Contents
ToggleKey Takeaways
- Wire railing deck systems use stainless-steel cables strung between posts to create unobstructed sightlines while meeting safety codes like the 4-inch sphere rule for child entrapment prevention.
- Wire railings offer superior durability and low maintenance compared to traditional wood or metal balusters, often lasting 20+ years with minimal care beyond occasional rinsing.
- Proper installation requires precision drilling, correct cable tensioning (500–1,000 lbs per cable), and plumb posts spaced 4–6 feet apart; skipping these details risks code failure.
- Stainless-steel cable railings adapt to multiple design aesthetics from modern farmhouse to industrial, making them a versatile choice for both elevated decks and residential properties.
- Horizontal cable orientation is the most common installation style, preferred for easier installation and superior views compared to vertical cable configurations.
- Choose marine-grade 316 stainless steel for coastal or salt-exposed regions to prevent corrosion, even though it costs 10–15% more than standard 304 stainless steel.
What Are Wire Railing Systems and Why They’re Popular
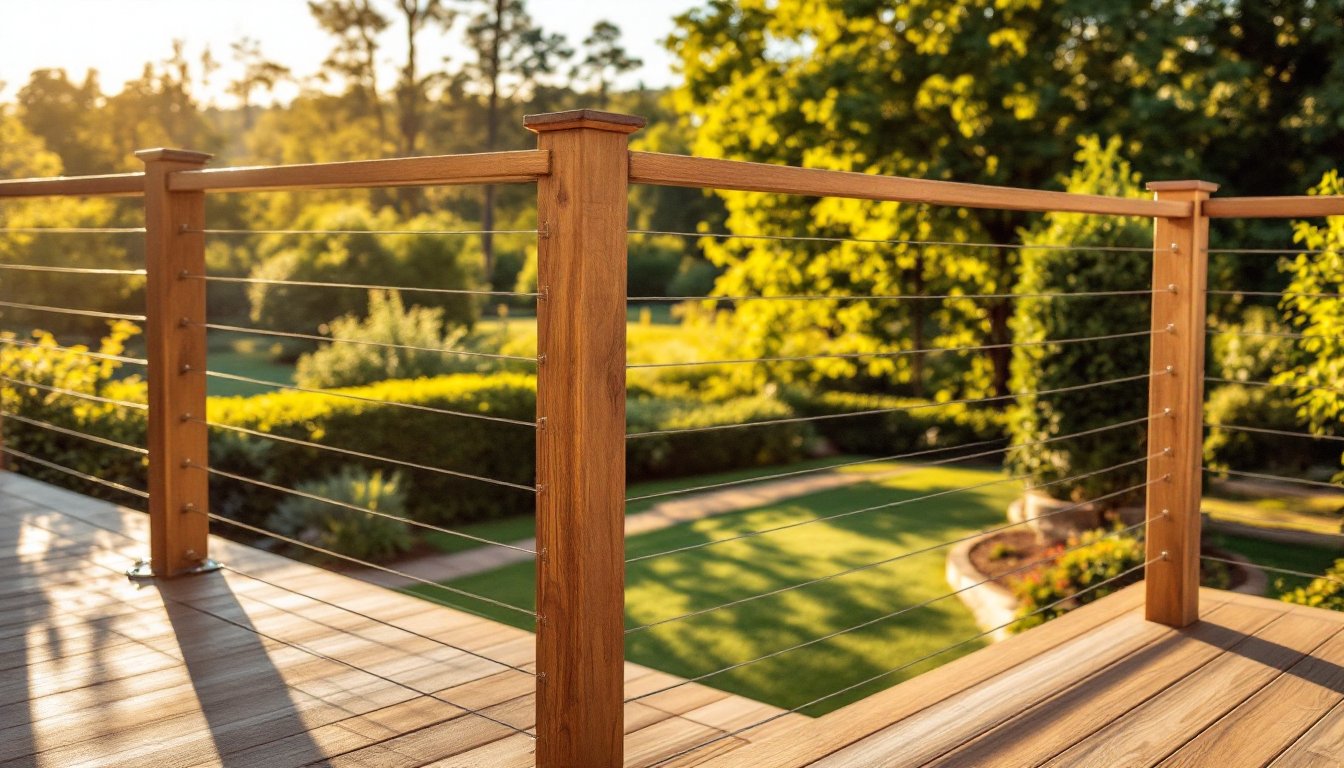
Wire railing systems, also called cable railings, consist of horizontal or vertical stainless-steel cables (typically 1/8-inch diameter) mounted between vertical posts and top/bottom rails. The cables are tensioned and secured using fasteners at each post, creating a rigid barrier that meets current building codes (IRC Section 2006 specifies 4-inch sphere rule: no opening larger than 4 inches to prevent child entrapment).
These systems gained popularity for good reason. First, they’re a direct response to the open-concept living trend, homeowners want unobstructed sightlines to gardens, water views, and outdoor spaces rather than solid railings that block views. Second, stainless steel resists rust and weathering far better than traditional materials, making them ideal for wet climates or coastal properties. Third, the aesthetic appeal is undeniable: wire railings feel contemporary and clean, suiting everything from modern farmhouse to industrial designs.
You’ll find two main installation styles: horizontal cables (the most common) run parallel to the deck surface, while vertical cables create a different visual rhythm. Most homeowners choose horizontal because they’re easier to install and offer better views. Both require sturdy posts, usually 4×4 (nominal, actually 3.5″ × 3.5″) spaced 4–6 feet apart, depending on cable tension and local building codes.
Benefits of Choosing Wire Railings for Your Deck
Unobstructed Views and Aesthetic Appeal
The primary draw is simple: you can see through them. Where a wood railing with 2×6 balusters blocks your view in horizontal slats, wire railings recede visually, making your deck feel larger and more integrated with the yard. This is especially valuable for elevated decks overlooking landscapes or water features.
Wire railings also adapt to a wide design range. Stainless steel pairs well with composite decking, wood, concrete patios, and modern pergolas. The minimalist profile complements both sleek contemporary homes and rustic designs, they’re not locked into one aesthetic. Unlike vinyl or aluminum railings, which can feel plastic or dated, stainless cable has a subtle, timeless quality.
Artisans on design-forward projects, like those discussed in home improvement resources, often specify wire railings precisely because they don’t compete with architecture: they enhance it. If your deck is your outdoor room, wire railings keep the focus where it belongs, on the view and the gathering space.
Durability and Low Maintenance Requirements
Stainless-steel cables and fasteners resist corrosion far better than painted wood or galvanized steel. In maritime or high-humidity climates, this is worth its weight in gold. You won’t face splintering, peeling paint, or rust stains running down your deck framing.
Maintenance is refreshingly minimal. A occasional rinse with a garden hose and mild soap keeps cables clean: some homeowners use a stainless-steel cleaner annually for a polished finish, but it’s optional. There’s no staining, painting, or sealing required. In harsh climates, you may need to check fasteners every few years and retension cables slightly, but these are 15-minute tasks, not weekend projects.
Durability translates to longevity. Properly installed wire railing systems often last 20+ years with minimal intervention. This makes the upfront cost more palatable for budget-conscious homeowners. One caveat: if your region uses road salt for de-icing, choose marine-grade 316 stainless steel instead of standard 304: it handles salt better and justifies the 10–15% premium.
Installation Basics for Wire Railing Decks
Before you start, understand the scope. Wire railings aren’t difficult for a handy DIYer, but they demand precision. Crooked posts, miscalculated cable length, or under-tensioned cables will be obvious and unsafe.
Tools and materials you’ll need:
- Drill-driver with bits (for fasteners)
- Tape measure and level (absolutely non-negotiable)
- Cable tensioning tool (supplied with most systems or available for ~$30–50)
- Adjustable wrench and socket set
- Stainless-steel cables (1/8-inch, typically 7×7 or 7×19 construction)
- Posts, fasteners, and hardware kit (usually sold as a complete system)
- PPE: safety glasses, work gloves, and a dust mask if cutting or drilling
The installation process breaks down into five steps:
1. Verify code compliance and spacing. Check your local IRC or building authority requirements: most require 4-inch sphere rule and posts spaced no more than 6 feet apart. Some jurisdictions mandate permits for railing work. Measure your deck perimeter and calculate how many posts and cable runs you need.
2. Install posts. Posts must be securely fastened to deck framing (bolted to rim joists or ledger boards, never just screwed to the surface). Use galvanized or stainless-steel bolts, washers, and nuts, never plastic anchors. For a typical deck, posts are typically spaced 4–5 feet apart horizontally. Ensure they’re plumb using a level: a post off by 1/4 inch will throw off cable alignment across the entire section.
3. Attach the rail frame. Top and bottom rails (usually aluminum or stainless steel, 1.5″ × 3″) are bolted to the posts. These create the framework that cables attach to. Ensure these rails are perfectly level and square: use shims if needed. A twisted frame causes uneven cable tension.
4. Bore cable holes in the rails. Depending on your system, you’ll drill holes into top and bottom rails for cable passage. Hole placement is critical, typically spaced 3–5 inches apart, matching the cable diameter (1/8-inch for standard systems). Use a drill-press or guide to ensure straight, perpendicular holes: angled holes create friction and weaken the tensioning.
5. Thread and tension cables. Feed stainless-steel cables through holes, starting at one end of a rail section. Use the tensioning tool to apply even pressure, typically 500–1,000 lbs per cable, depending on your system’s specs (your kit instructions will specify). Tighten fasteners gradually in a cross-wise pattern to avoid twisting. Once tensioned, cables should barely move under hand pressure: any slack is a safety and code failure.
Pro tips: Most DIYers underestimate the importance of the drilling step. A drill-press or homemade drilling guide (as discussed in detailed cable-rail installation guides) ensures perpendicular, consistent holes. Secondly, pre-tension the cables slightly before final fastening: this prevents over-tightening and cable stretch later. Third, if your deck wraps around a corner, use a corner post assembly designed for your system, DIY shortcuts here cause weak points.
If you’re uncomfortable with tensioning or precise hole-drilling, hire a contractor for this phase. A $300–500 professional assist beats a wobbly, code-failing railing. Building inspectors will spot uneven tension immediately during a railing inspection.
Conclusion
Wire railing decks offer a modern, durable, and visually appealing alternative to traditional balusters, and for many homeowners, the unobstructed views and minimal maintenance justify the upfront cost. Installation is manageable for a confident DIYer with proper tools and attention to detail, but it’s not forgiving of shortcuts. Measure twice, drill straight, and tension evenly. If any step feels uncertain, don’t hesitate to call a professional. A safe, code-compliant railing is the foundation of an enjoyable deck.